Next Steps for Your Supergraph
Get the most out of GraphOS
After you create a supergraph with GraphOS Studio, read below to learn about some of the next steps you should take to get the most out of it and the entire GraphOS platform.
ⓘ NOTE
You should always start by installing the Rover CLI. Otherwise, you can perform the steps described on this page in any order.
First, install the Rover CLI!
The Rover CLI is the primary command-line interface for interacting with GraphOS. You'll use Rover both locally and in CI environments to perform a variety of actions on your supergraph and its individual subgraphs.
Install Rover, then return to this article.
Run your supergraph locally
See this article.
Subgraph actions
Update a subgraph schema
When you first set up your cloud supergraph, GraphOS Studio fetches your existing GraphQL API's schema. Your existing API becomes the first subgraph in your supergraph:
This initial schema fetch is a one-time action to help you get started. Whenever your API's schema changes, Studio doesn't automatically fetch it again. This means your router doesn't know about those changes. Clients can't include any new schema fields in their queries until your router does know about the changes!
Whenever you update your subgraph's schema, you need to publish those changes with the Rover CLI. Learn about publishing subgraph schemas.
After learning about the publishing process, you should integrate it into your CI workflow.
Add another subgraph
One of the most powerful features of a supergraph is that it can combine multiple GraphQL APIs into a single graph:
With this architecture, different teams in your organization can each maintain their own subgraph. This helps teams work in parallel, because they aren't all contributing to the same single codebase.
1. Build your new subgraph
2. Add the subgraph to your supergraph
Add another variant
Most supergraphs have multiple variants, each of which represents that supergraph running in a different environment (for example, production, staging, development).
If your supergraph runs in multiple environments, you should create a different variant for each.
Enable federation features
Supergraphs use an architecture called Apollo Federation. Federation is at its most powerful when your subgraphs share responsibility for some of your schema's types, instead of defining mutually exclusive types and fields.
To take full advantage of federation features, each of your subgraphs needs to use a GraphQL server library that conforms to the Apollo Federation subgraph specification. Fortunately, many popular server libraries do!
- To check whether your current GraphQL server library supports the subgraph specification, see this article.
- If your library does support the spec, consult its documentation to learn how to enable its federation support. For Apollo Server, see this article.
- If your library doesn't support the spec, consult the library list to find an alternative in your preferred programming language.
- Enable federation support for all your subgraphs and deploy the updated subgraphs to your environment.
After you make these changes, you can start using powerful federation features in your subgraphs, including:
- Entities (object types that are defined and resolved across multiple subgraphs)
- Federation-specific directives for sharing types, marking fields as inaccessible, and more
- Federated trace reporting for metrics visualization in GraphOS Studio
Set up continuous delivery
Every time you want to make changes to one of your subgraphs, you should do the following:
- Verify that your proposed changes won't break your supergraph or any of your existing clients.
- To do this, you set up schema checks for your supergraph.
- Whenever you deploy verified changes, always publish your updated subgraph schema to GraphOS as part of that deployment.
- For a basic example of this, see Publishing with continuous delivery.
Disable client-subgraph communication
With a supergraph architecture, clients should never query your individual subgraphs directly. Instead, they should always query the router! This means your subgraphs can (and should) reject incoming requests from any source besides the router.
How you choose to configure this access control depends on your GraphQL server library and your particular infrastructure.
⚠️ CAUTION
Make sure any existing clients that communicate directly with your API are updated to communicate with your router before you begin rejecting direct requests!
For more information, see Securing your subgraphs.
Studio actions
Configure notifications
GraphOS can send you various types of notifications via a few different channels (including Slack and PagerDuty). These notifications can include a daily metrics report, schema change updates, and experimental performance alerts. Set up notifications.
Invite team members
If you've created a Studio organization to collaborate with your team, invite your team members from the organization's Members tab.
Client actions
Add identification headers to your clients
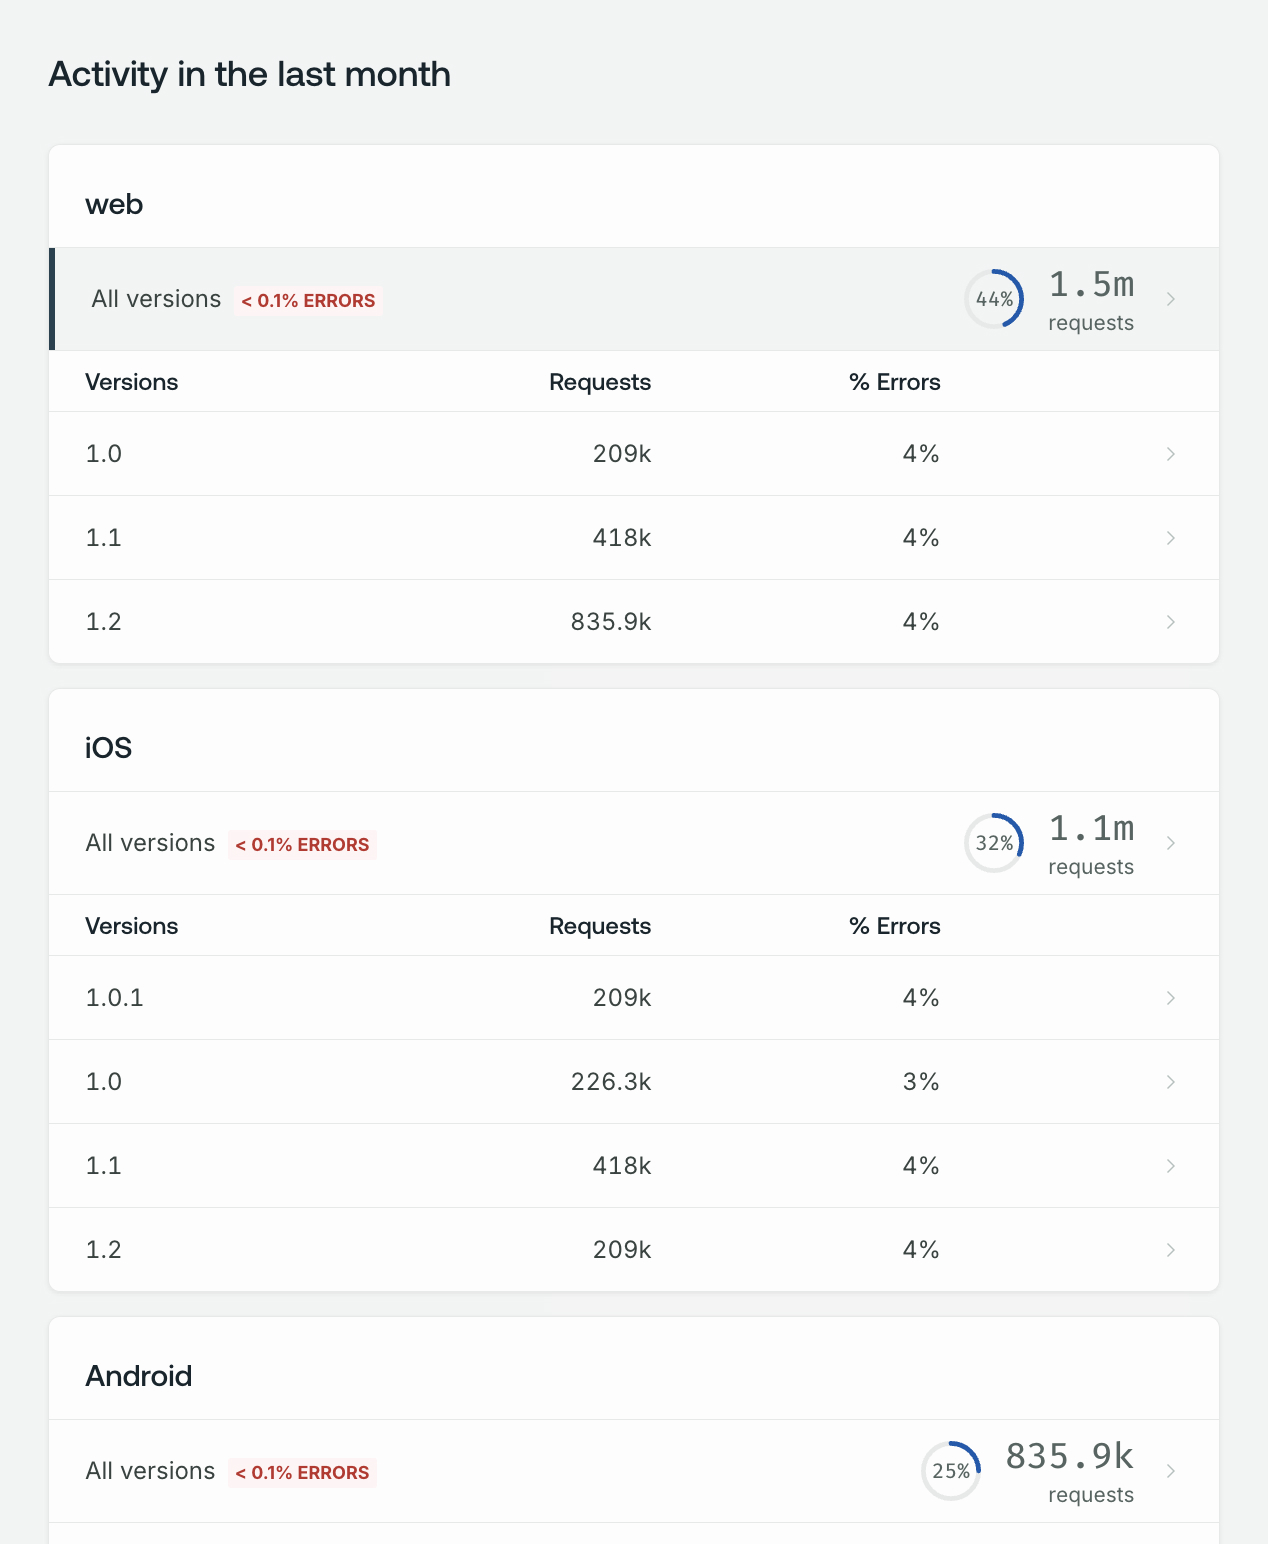
A supergraph variant's Clients page enables you to view operation metrics, segmented by your different clients:

To get the most out of this feature, each of your client applications should set values for the following HTTP headers in each request they send to your router:
apollographql-client-nameapollographql-client-version